What Are the Stages of Sludge and Sediment Sampling?

Sludge and sediment sampling is critical for environmental monitoring, regulatory compliance, and remediation planning. Inaccurate or inconsistent samples can distort test results, misguide project planning, or trigger legal repercussions. That’s why it’s essential to understand the full process before getting started.
So, what are the stages of sludge and sediment sampling? Let’s walk through what to expect at each phase.
Site Assessment and Planning
Before selecting tools or collecting samples, the first step is understanding your site, including its constraints, risks, and potential variables. During the planning phase, review regulatory requirements to ensure your sampling strategy meets local, state, and federal guidelines. Review historical data, if available. Prior sampling results, land use records, or known contamination sources will help you pinpoint your targets.
Next, conduct a physical walk-through or visual assessment. Look for signs of standing water, erosion, access limitations, or unexpected runoff pathways. These details will influence where, when, and how you sample.
Map sampling locations in advance using GPS coordinates or marked grids for repeatability and spatial accuracy. Determine the number of samples required to meet project goals and whether the focus is on surface materials, deeper layers, or both.
Plan for redundancy when possible; duplicate samples confirm consistency and reduce the risk of missing anomalies. If you’re sampling a large or high-risk site, build in extra time for safety briefings and permitting requirements.
Selecting the Right Tools
Equipment selection should reflect the site conditions and the characteristics of the material being sampled. Sludge and sediment vary in texture, density, and moisture content, and each of those factors will influence what tools you need.
Shallow, soft-bottom sites may only require basic hand augers or dredges, while deeper or more compacted materials might call for core samplers or direct push rigs (PowerProbes).
Using the right sediment sampling equipment reduces sample disturbance, maintains stratification, and minimizes contamination. For example, some sludge and sediment samplers allow you to visually inspect layers before removing material, while others directly collect samples within liners ideal for accurate collection and analysis of volatile organic compounds (VOCs).
Additionally, clean equipment between sampling points and follow decontamination protocols to prevent cross-contamination. Instruments used to measure depth, temperature, or water quality require proper calibration before and during use for accurate readings.
Having backup equipment on-site keeps the process on track if a tool malfunctions or if conditions shift unexpectedly. A well-stocked and well-considered tool kit is one of the most effective ways to maintain sampling integrity.
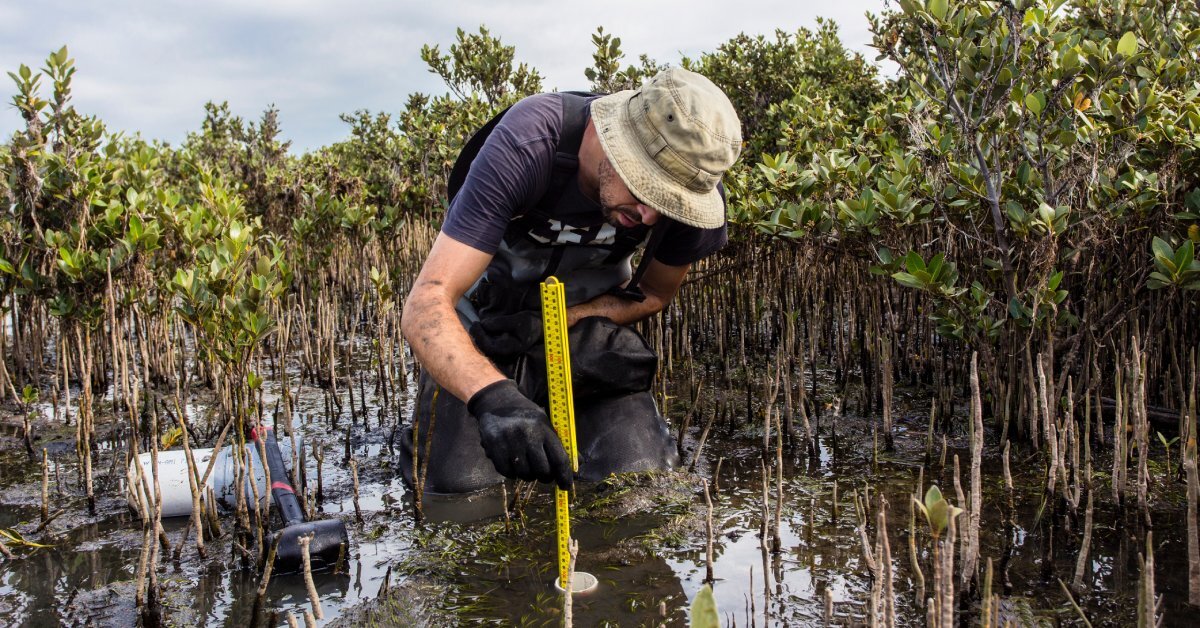
Collection Methods
Selecting the right collection technique depends heavily on the site and sampling goals. For surface sediment, grab sampling is a quick and effective method, utilizing tools such as bottom sampling dredges to collect material without disturbing deeper layers.
When vertical profiling is needed, core sampling offers insights into how sediment layers have developed over time. The required sampling depth varies depending on project objectives, with shallower cores suitable for general assessments and deeper cores often used to investigate long-term or historical contamination.
Sludge sampling requires extra care, as the material is often semiliquid and heterogeneous in nature. Avoid stirring up sediment or mixing strata, as this can skew contaminant levels. In all cases, maintain a consistent technique across sampling points to produce comparable and reliable data. Training field teams on proper collection steps reduces variability and avoids common pitfalls.
Sample Handling and Preservation
After collecting samples, how they’re handled can make or break the entire process. Immediately transfer samples to clean, labeled containers. Use containers appropriate for the sample type—glass for VOCs, plastic for general sludge and sediment—and tighten seals to prevent leakage or contamination.
Preservation often requires keeping samples chilled at -4 degrees Fahrenheit or colder to slow biological activity without freezing, which can alter sediment structure. Some analyses may require chemical preservatives, so follow lab guidelines precisely.
Chain of custody documentation should begin here, tracking sample custody, storage conditions, and transport details. Minimizing the time between collection and laboratory analysis maintains the sample’s integrity and reliability.
Documentation and Reporting
Accurate documentation confirms your samples are useful beyond the collection day. Field notes should include details like weather conditions, water depth, sediment color and texture, odors, and anomalies observed during sampling. These observations provide essential context when interpreting lab results and can help flag potential inconsistencies.
Digital tools, such as tablets with GPS integration, streamline logging and reduce transcription errors; however, maintain a backup paper log in case of technical issues. Reporting should align with regulatory expectations, including sample IDs, time stamps, and exact coordinates. The completer and more consistent the records, the easier it's to defend your data, replicate your process, or trace the origin of irregularities.
Well-documented sampling activities are especially important when monitoring is repeated over time. Having complete records makes it easier to identify trends, explain changes in results, and ensure continuity between site visits.
Post-Collection Analysis
Once samples arrive at the lab, analysis begins, but the field team’s role isn’t necessarily over. The types of analyses planned should inform how samples are collected, labeled, and preserved from the start.
Analyses might focus on heavy metals, hydrocarbons, nutrient levels, or microbial activity, each requiring different handling protocols. Communicating clearly with the lab ahead of time prevents delays and ensures the right tests are run.
The lab’s findings help answer key questions. How contaminated is the site? Are remediation efforts working? Is the area safe for use? However, interpreting the results requires context.
Site conditions, historical data, and field observations shape how your team interprets the data. Stay involved post-sampling to review lab reports and clarify unexpected findings. Treat this as a continuation of the process, not its end.
Engaging with analysts during the review phase can help clarify discrepancies or outliers in the results. It also ensures the field and lab teams are aligned in how data is used.
Scale and Support
One final stage that’s often overlooked is preparing for what comes next. After sampling and analysis, the focus shifts to expanding monitoring programs, refining methodologies, or applying the same protocols to new locations. That next step becomes easier and far more effective when working with tools designed to scale with evolving demands.
As we consider the stages of sludge and sediment sampling, it’s worth asking whether your current equipment can support the next phase. From hand tools to PowerProbes, having reliable, field-tested solutions in place makes it easier to meet expectations and respond quickly to changing site conditions. Equip yourself for what comes next, with tools built to perform wherever the work takes you.
Recent Posts
-
Soil Vapor Probe Installation Drive Tip Designs
 Precision matters in soil vapor intrusion investigations. The quality of the data shapes risk assess …February 26, 2026
 -
Bucket Auger Applications for High-Moisture Soils
 Geotechnical and environmental sampling brings unpredictable field conditions, and saturated soils c …January 16, 2026
 -
Why Sediment Sampling Is Important in Land Conservation
 When it comes to land conservation, the decisions we make today shape the future of our natural spac …January 12, 2026